Baby Feet Cut-Out Cookies: Easy and Adorable
Want to bake the cutest cookies ever? Look no further than these adorable baby feet cut-outs! They’re perfect for baby showers, welcoming a new little one, or just because. This easy-to-follow guide will walk you through every step, from gathering the ingredients to decorating your masterpieces.
Secret Weapons for Scrumptious Cookies
The key to fantastic Baby feet cut-out cookies lies in using the best ingredients:
- All-purpose flour 200g: This is your baking workhorse, providing the perfect structure for your cookies.
- Unsalted butter: You control the flavor, and it helps achieve that melt-in-your-mouth texture.
- Fine granulated sugar150g: Dissolves evenly, giving your cookies a touch of sweetness and a crisp bite without changing their shape.
- Room temperature eggs 1: Essential for a smooth batter and rich-flavored cookies.
- Pure vanilla extract 2 tsp: Adds a depth of flavor and wonderful aroma.
Baking Baby feet cut-out cookies Like a Pro: Step-by-Step


- Creamy Dream Team: Start by creaming together your butter and sugar until light and fluffy. This incorporates air, making your cookies airy and delightful.
- Eggs & Vanilla In: Gradually add the eggs and vanilla extract, one at a time, making sure each ingredient is fully mixed in before adding the next. This keeps your batter nice and smooth.
- Saying No to Clumps: Whisk your dry ingredients (flour and anything else) together, then slowly add them to the wet mixture. This prevents clumps and ensures everything is evenly distributed.
- Chilling Out: Wrap your dough in plastic wrap and give it a rest in the refrigerator for at least an hour. This step is important because it firms up the butter, which helps your cookies keep their shape while baking.
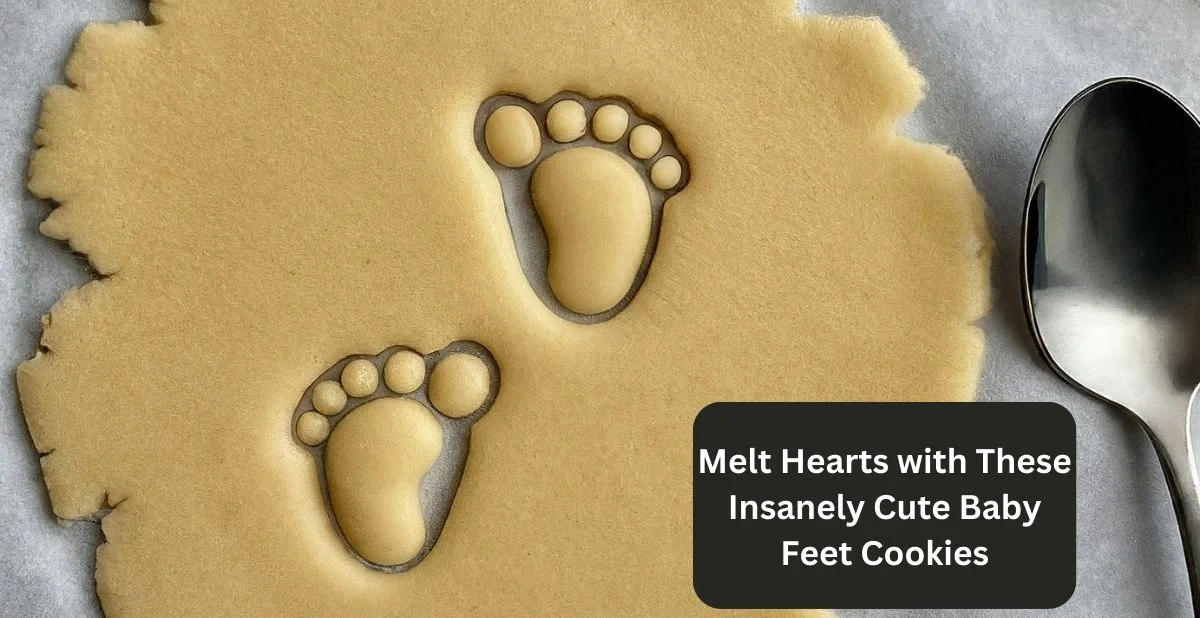
- Rolling and Cutting Fun: On a lightly floured surface, roll out your dough to about ¼ inch thickness. Then, grab your baby feet cookie cutter and gently press out your shapes.
- Baking Magic: Preheat your oven to 350°F (175°C). Bake your cookies on a baking sheet lined with parchment paper for 8-10 minutes, or until the edges start to turn golden brown.
- Cooling Down: Let your cookies cool on the baking sheet for 5 minutes before transferring them to a wire rack to cool completely. Once they’re cool, it’s decorating time.
Also: Perfect Sautéed Chicken of the Woods : A Simple recipe
Decorating Ideas to Make Your baby Feet cut-out
The decorating part is all about unleashing your creativity! Here are some ideas to get you started:
- Royal Icing: This icing is popular for its smooth finish and endless color options. You can pipe on tiny toes and other cute details.
- Sprinkle Celebration: Before baking, sprinkle your cookies with colored sugars or edible glitter for a playful touch.
From Simple to Spectacular, You’ve Got This
Making these baby feet cut-out cookies is a fun and rewarding experience, and with this guide, you’ll be a cookie-decorating pro in no time. So, grab your ingredients, preheat your oven, and get ready to bake some sweetness and smiles.
Related FAQ’s
How do I get my cut-out cookies to keep their shape?
Chilling the dough is key! The cold butter helps the cookies hold their shape during baking. Wrap the dough in plastic and chill for at least an hour before rolling and cutting.
I’m a baking beginner. Can I still make these cookies?
Absolutely! This guide takes you through every step, and you baby feet cut-out cookies are achievable for any skill level.
Are there any other tips for baking perfect cut-out cookies?
Use a light touch when rolling out the dough to avoid tough cookies.
Flour your cookie cutters slightly to prevent sticking.
Bake for just the right amount of time – you want the edges to be golden brown but not overbaked.
Let the cookies cool completely before decorating to avoid the icing melting.
Bonus Tip: For perfectly round cookies, use a round cookie cutter and then indent the “heel” and toes with a small spoon or knife to create the baby feet shape here you ready your baby feet cut-out cookies like a pro.
0 Comments on “Baby Feet Cut-Out Cookies: Easy and Adorable”